09 · Installation on Windows
This chapter explains how to install Factuzam on a Windows computer from scratch: the database server, initial database and application. It is intended for the installer/administrator; end users only need 00 · Access and first steps.
Obtaining and testing the demo
Before preparing a complete installation, download the current installer for Factuzam DEMO on 64-bit Windows:
Download Factuzam_DEMO_1.0.15.202606260100.alpha.exe
The package name includes its version and date. Do not reuse the URL for an earlier build; if the download becomes unavailable, confirm the current package with support before installing it.
The demo is supplied as a self-installing NSIS installer. When run on
64-bit Windows, the wizard installs Factuzam DEMO under
%PROGRAMFILES%\Factuzam DEMO, installs a local MariaDB for testing on
port 3310, creates the demonstration database and adds shortcuts to the
desktop and Start menu.
This demo is for testing the application locally. A company's final installation can use the manual procedure in this chapter or a package prepared for that specific installation.
1. Requirements
| Component | Requirement |
|---|---|
| Operating system | Windows 10 / Windows 11 (also Windows Server for the computer hosting the database). |
| Database | MariaDB (MySQL-compatible). It can be installed on the same computer or on a local-network server. |
| Application | In a manual installation, fzam.exe is a self-contained executable. The downloadable demo uses an NSIS installer and includes a local test MariaDB. |
| Network | If there are several workstations, they must all be able to reach the MariaDB server over TCP (port 3306 by default). |
| Peripherals (POS) | An ESC/POS-compatible receipt printer and a USB barcode scanner in keyboard-emulation mode; both are optional outside Caja. |
Specific Caja requirements:
- The receipt printer must be able to print QR codes in native ESC/POS mode.
- The barcode scanner must operate over USB in keyboard-emulation mode and send the code with an STX prefix (
0x02) and ETX suffix (0x03). - The scanner must not add any other prefix or suffix: no Enter, Tab or extra characters before or after the code.
2. Installing the MariaDB server
- Download MariaDB for Windows from mariadb.org/download and install it on the computer that will act as the server (the same PC for a standalone setup).
- During installation:
- Set the
rootpassword and store it securely. - Configure the service to start with Windows.
- Default port: 3306.
- Set the
- If other workstations will connect, open port 3306 in the server's Windows Firewall (for the local network only).
Factuzam uses the
utf8mb4character set withutf8mb4_spanish_cicollation; the database will be created this way in the next step.
3. Creating the initial database
The model database is distributed in factuzam_original.sql (complete
schema plus system data: countries, VAT types, windows, initial user and so
on).
Option A — from the application itself (recommended):
- First create the empty database. From a server console:
``sql
CREATE DATABASE factuzam
CHARACTER SET utf8mb4
COLLATE utf8mb4_spanish_ci;
``
- Start
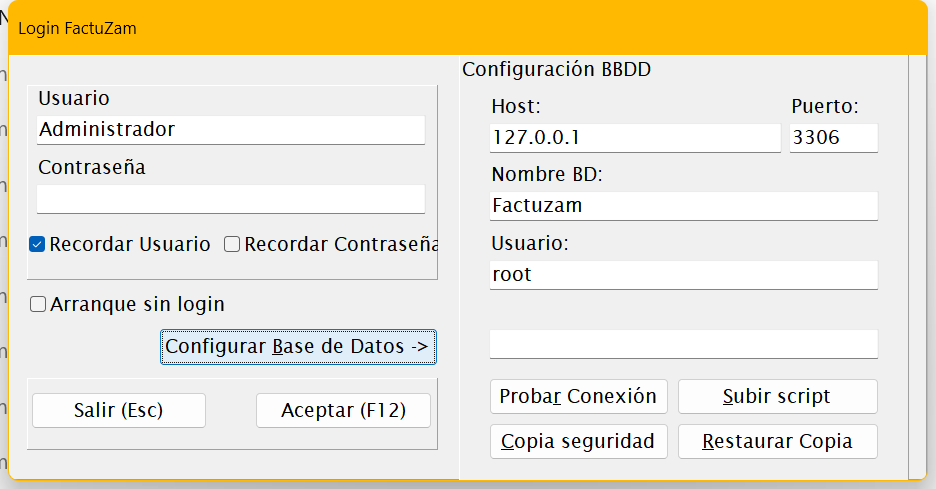
fzam.exeand, in Login, press Configurar Base de Datos ▸ and complete Host, Puerto, Nombre BD (factuzam), Usuario and Contraseña. - Press Subir Script: enter the database password and select an
.sqlfile; choosefactuzam_original.sqland wait for loading to finish. - Press Probar Conexión to verify it.
Option B — from the command line:
mysql -h localhost -P 3306 -u root -p ^
      -e "CREATE DATABASE factuzam CHARACTER SET utf8mb4 COLLATE utf8mb4_spanish_ci;"
mysql -h localhost -P 3306 -u root -p factuzam < factuzam_original.sql
(Any graphical client can also be used: HeidiSQL, DBeaver and so on.)
Dedicated database user (recommended): avoid using root from
workstations; create a dedicated application user:
CREATE USER 'fzam'@'%' IDENTIFIED BY 'una_clave_segura';
GRANT ALL PRIVILEGES ON factuzam.* TO 'fzam'@'%';
FLUSH PRIVILEGES;
4. Installing the application on each workstation
- Create a folder, for example
C:\Factuzam\, and copyfzam.exeinto it. - Create a shortcut on the desktop/Start menu.
- Start the application and, in Login, press Configurar Base de Datos ▸; enter:
| Field | Value |
|---|---|
| Host | MariaDB server IP address or name (localhost in a standalone setup). |
| Puerto | 3306 (unless it was changed). |
| Nombre BD | factuzam. |
| Usuario / Contraseña | The database user created in step 3. |
- Press Probar Conexión — it should respond successfully.
The configuration is saved for each Windows user under
%LOCALAPPDATA%\factuzam\(an.inifile). Each workstation only needs to be configured once.
5. First sign-in
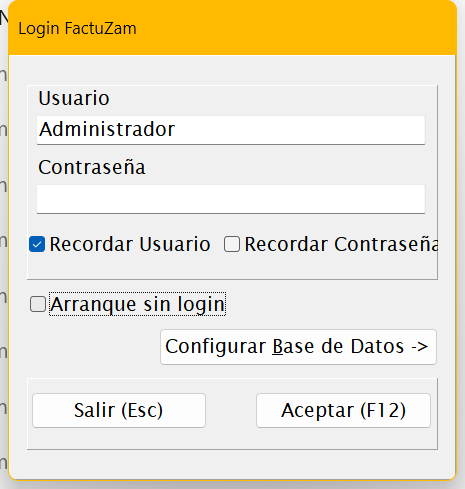
- Initial user:
Administrador(group Administradores), with the password supplied with the installation. - After signing in, change the administrator password and create the real users under Otros ▸ Usuarios, Grupos y Perfiles.
6. Go-live checklist
Configure the following in this order before starting work:
- Empresa — tax details, NIF, invoicing series and Verifactu certificate (Archivo ▸ Empresas).
- Impuesto IVA and Grupos de IVA — verify the current rates (Otros ▸ Impuesto IVA).
- Contadores — initial document numbering by series (Otros ▸ Contadores).
- Almacenes and Cajas — at least one warehouse and its till (Archivo ▸ Almacenes).
- Formas de pago — documents under Otros ▸ Formas de pago documentos and till under TPV ▸ Formas de Pago Caja.
- Tablas auxiliares and catalogue — families, sizes/attributes, price lists and items (Archivo ▸ Tablas Auxiliares; or through migration from the previous software).
- Usuarios, grupos y permisos — one user per person, with permissions by group.
- Parámetros de Caja — receipt printer and POS behaviour (TPV ▸ Parámetros de Caja).
- Copia de seguridad — make an initial backup and establish the routine (Otros ▸ Hacer Copia de Seguridad).
7. Local application files
Each workstation stores its local data under %LOCALAPPDATA%\factuzam\:
| Folder / file | Contents |
|---|---|
fzam.ini | Workstation configuration (connection, remembered user and so on). |
log\ | Application log files (useful for support). |
tickets\ | Receipts generated by the POS. |
These files are per Windows user and do not contain business data (which is all held in MariaDB).
8. Updates
- Updating the application consists of replacing
fzam.exewith the new version (with the application closed on all workstations). - If the version includes database schema changes, they are supplied as idempotent SQL scripts that are applied once to the database (they can be loaded with the Login Subir Script button). Follow the instructions for each version.
- Check the installed version under Ayuda ▸ Acerca de.
Back up the database before updating.
◀ Ayuda menu · Contents · Next ▶ Migration from legacy software