00 · Access and first steps
This chapter describes what happens from the moment you start Factuzam until the main window is ready for work.
Practice in the DEMO program: the first time you sign in, use the demo administrator account only to create your own password-protected user under Otros ▸ Usuarios, Grupos y Perfiles. Assign it to the Administradores group, then sign in again from Archivo ▸ Invocar login to continue testing with your own user.
1. Splash screen
When the application starts, the splash screen displays the logo and version number for a few seconds. It is purely informative and requires no action. You can view the same screen at any time from Ayuda ▸ Acerca de.
2. Signing in (Login)
The Login FactuZam window then appears:
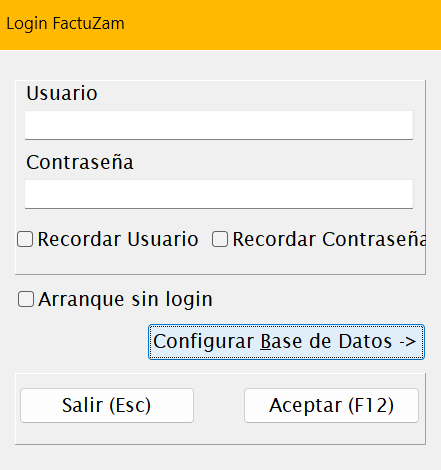
| Field | Description |
|---|---|
| Usuario | Application user name. |
| Contraseña | User password. |
| Recordar Usuario | Saves the user name for the next start-up. |
| Recordar Contraseña | Saves the password as well (use this only on trusted computers). |
| Arranque sin login | When selected, the application opens directly next time without requesting credentials. |
If you need to switch users during the same session, you can do so from
Archivo ▸ Invocar login or with [Ctrl]+[Mayúsculas]+[L].
Buttons:
- Aceptar (F12) — validates the credentials and opens the application.
- Salir (Esc) — closes the application without signing in.
The user determines your permissions profile, which controls the menus and actions available to you in the application.
3. Database configuration
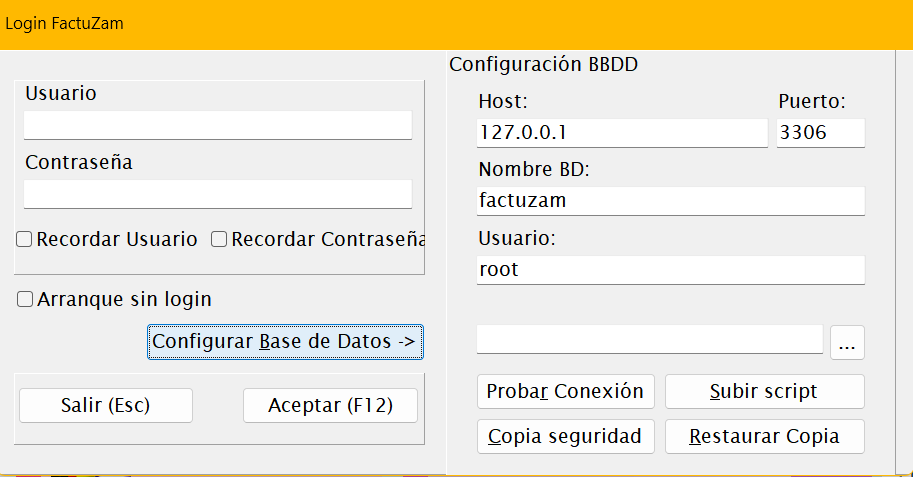
In the login window, the Configurar Base de Datos ▸ button expands the Configuración BBDD panel. This is where you enter the connection details for the MariaDB/MySQL server that holds the data:
| Field | Description |
|---|---|
| Host | Server that hosts the database (for example, localhost or an IP address). |
| Puerto | Server port (MariaDB uses 3306 by default). |
| Nombre BD | Name of the Factuzam database. |
| Usuario | Database user. |
| Contraseña | Database user password. |
Panel buttons:
- Probar Conexión — checks that the details are correct and the server is responding, without signing in.
- Configurar/cambiar credenciales del servidor (
...) — advanced connection administration tools.
This configuration is normally completed once by the installer or administrator. A regular user does not need to change it. If a connection error appears at start-up, contact the administrator before changing anything here.
4. The main window
Once the login has been validated, the Factuzam main window displays:
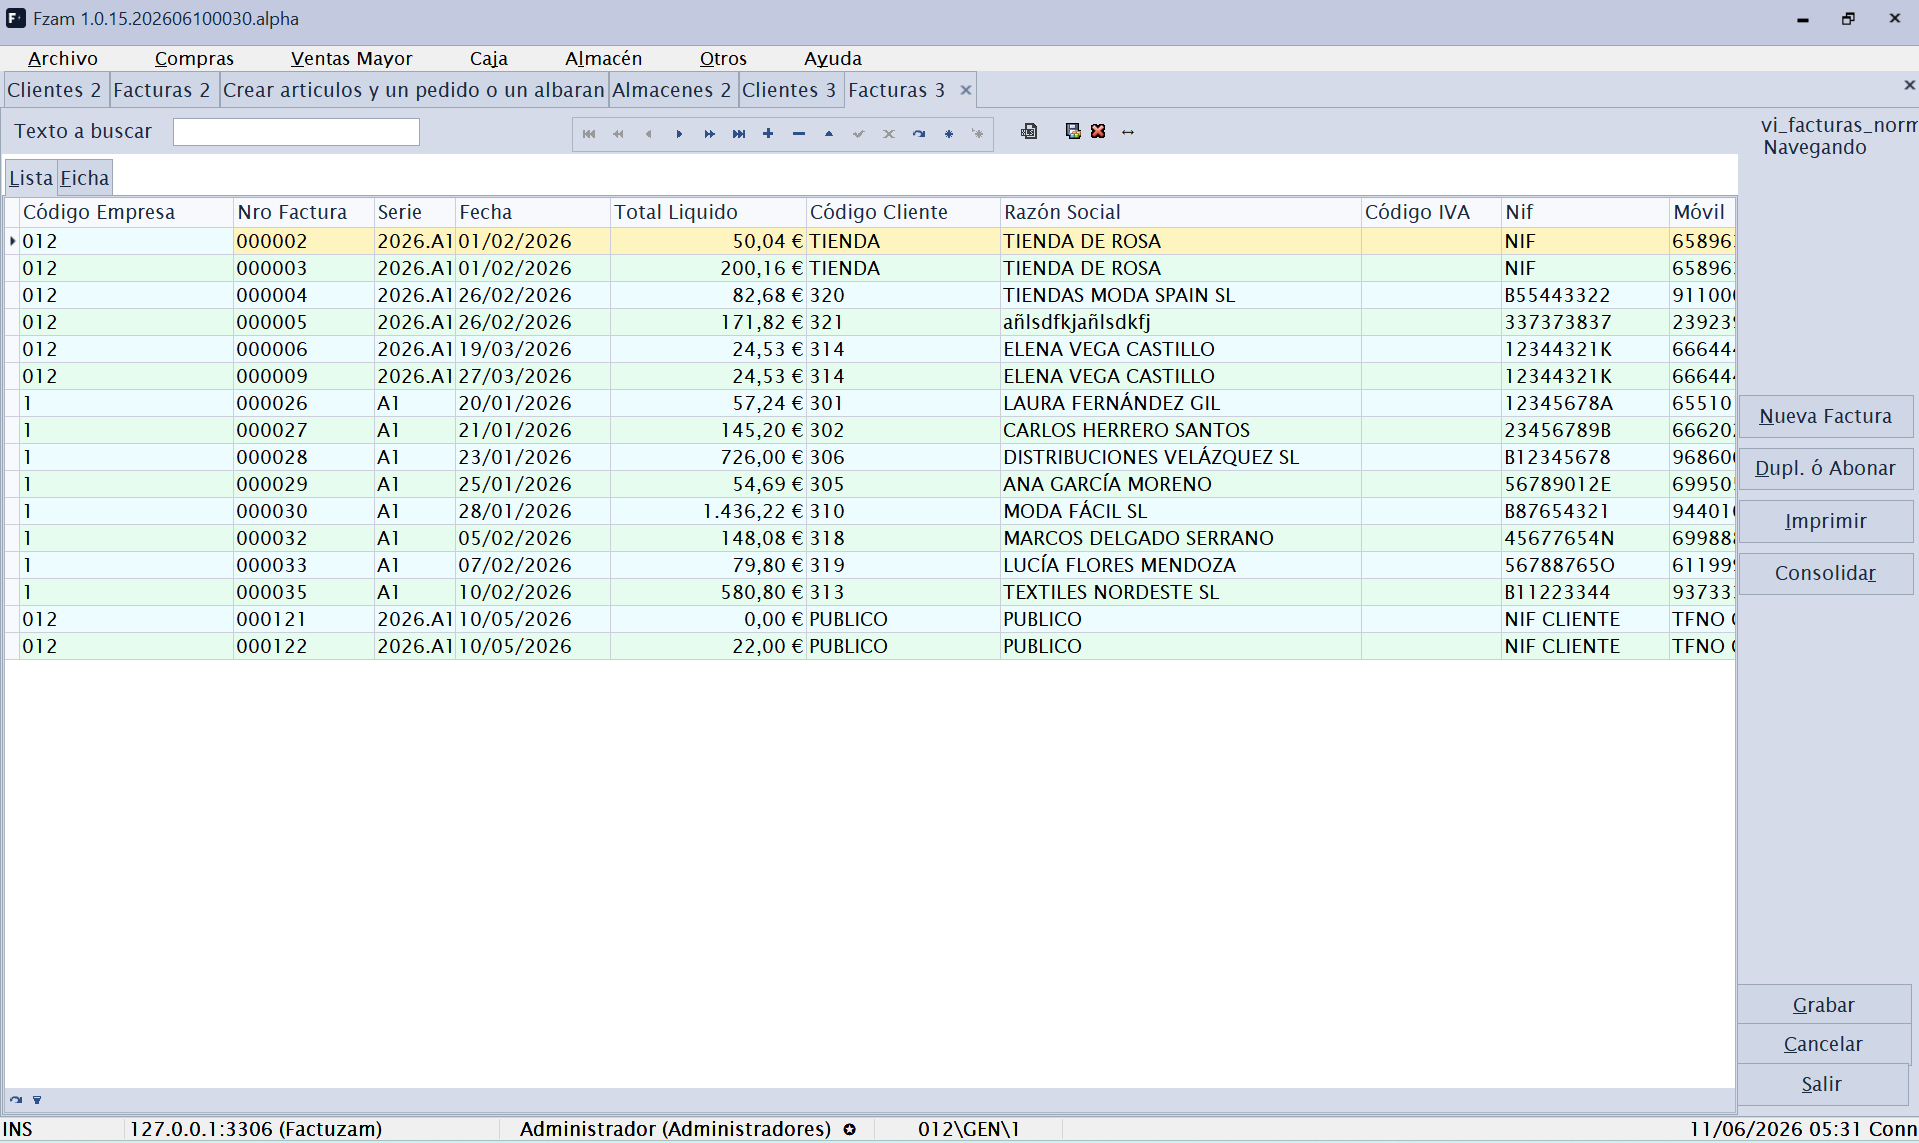
- The menu bar at the top (Archivo, Compras, Ventas Mayor, Caja, Almacén, Otros, Verifactu, Ayuda). This is the application's main navigation system and provides the structure followed by this manual.
- A tabbed workspace: every menu option you open is loaded as a tab within the main window, so you can have several screens open at the same time and switch between them with Control + Tab.
- A status bar at the bottom with contextual information (user, active company, version and so on).
How screens open
When you select a menu option, the application opens the corresponding maintenance screen in a new tab (or reuses the tab if it is already open). Some screens support several simultaneous instances (a number appears next to the title, for example Clientes 2).
The internal operation of each screen (list, record, search, navigation, saving and so on) is common to nearly all maintenance screens and is explained once in 01 · Common concepts. It is worth reading that chapter before the chapters for each menu.
5. Practice in the DEMO program: basic data
After signing in with your own user, use the demo to prepare a minimal test environment. The aim is to create a small number of properly related records, so you can purchase, sell and review stock without depending on real data.
You can experiment freely in the demo, but it is best to follow this order: administration data first, then size and colour catalogues, and finally items and documents.
5.1 Companies, documents and payment methods
- Open Archivo ▸ Empresas and create or review a test company. Complete the basic tax details and open the Series sub-tab to define the invoicing series that its documents will use.
- Open Otros ▸ Impuesto IVA and Otros ▸ Grupos de IVA. In a demo it is normally sufficient to review the existing rates before changing anything.
- Open Otros ▸ Contadores and check the initial numbering for invoices, delivery notes, orders and other documents by company and series.
- Open Otros ▸ Formas de pago documentos and create the usual payment methods for purchases and wholesale sales: cash, bank transfer, direct debit and so on.
- If you intend to test the POS later, also prepare its collection methods: cash, card, voucher or any others you need.
5.2 Warehouses and tills
- Open Archivo ▸ Almacenes and create at least one sales warehouse. Enter its name, address where applicable, and warehouse uses.
- In the Cajas de Venta sub-tab, create the physical tills associated with that warehouse. Each till represents a sales position, counter or terminal within the warehouse.
- If there are several payment positions, create one till for each so that transactions, cash counts and cash movements can be separated later.
- A simple exercise only needs one active sales warehouse and one active till.
5.3 Sizes, colours, seasons and price lists
- Open Archivo ▸ Tablas Auxiliares ▸ Atributos básicos and create the elementary values you will use: sizes, colours and standardised equivalents.
- Open Archivo ▸ Tablas Auxiliares ▸ Tipos de Variaciones and create the Talla and Color axes. Add their attributes to each one: S, M, L, XL, 38, 40, red, blue, black and so on.
- Open Archivo ▸ Tablas Auxiliares ▸ Colecciones de Atributos and prepare reusable sizing systems, for example Mujer S-XL, Calzado 36-41 or Niño 2-16. You can then apply them to several items without repeating the same size range.
- Open Archivo ▸ Tablas Auxiliares ▸ Propiedades and create the Temporada property with values such as Primavera-Verano, Otoño-Invierno or the year/campaign you will use in the exercise.
- Open Archivo ▸ Tablas Auxiliares ▸ Tarifas and create a test sales price list. Later, when you create items or purchase sessions, you will assign prices to this list.
5.4 Test items and the first workflow
- Open Archivo ▸ Artículos and create a simple item: description, family, unit of measure, VAT and price list.
- On the item record, use variations and collections to generate its size/colour SKUs. Each SKU is a saleable combination with its own stock.
- To test a real goods receipt, open Compras ▸ Sesiones. There you can create items with colours and sizes, distribute units by size and generate the purchase order or delivery note.
- Check the result under Almacén ▸ Informes or in the item's stock enquiry. This prepares the basic data needed to test purchases, sales or movements.
When you finish this exercise, you will have created the minimum basic data: company, documents, warehouse, till, sizes, colours, sizing systems, seasons, price lists and test items.